
Category: Home Improvement

Renovation, remodeling, repairs, and upgrades

  • The $200 Window Attic Renovation: Big Impact on a Budget

    The $200 Window Attic Renovation: Big Impact on a Budget

    The idea behind a $200 window attic renovation is simple but powerful: a single affordable statement window, often a salvaged or surplus find, can transform a dark, awkward attic into a bright, inviting room without a huge budget. The concept gained attention from a widely shared attic makeover in which a large half-round window, marked down to just $200 at a surplus store, became the centerpiece that turned a quirky attic into a cozy bedroom. It shows that in attic spaces, where natural light is often scarce, the right window can deliver an outsized impact for surprisingly little money.

    Attics are full of potential but notoriously short on light and charm, so a well-chosen window is one of the highest-impact, lowest-cost upgrades you can make. This article explains why a single window makes such a difference, where to find affordable statement windows, other budget ways to brighten an attic, and the important safety and permit considerations, since some attic window work is genuinely a job for professionals.

    The idea One affordable window transforms a dark attic
    Inspiration A salvaged half-round window found for $200
    Why it works Natural light dramatically improves attic spaces
    Where to find deals Surplus, salvage, and architectural reclaim stores
    Bonus features Window benches add storage and hide ductwork
    Budget-friendly A statement window costs far less than a full remodel
    Watch for Egress rules, structural and code requirements
    Pro work Structural, electrical, and cutting into the roof

    Why One Window Changes Everything

    Attics tend to be dim, closed-in spaces, so the biggest single obstacle to making one feel like a real room is usually light. This is exactly why a single well-placed window can be transformative: it floods the space with natural light, makes the room feel larger and more welcoming, and gives the eye something to focus on. In the makeover that popularized this idea, the homeowner described the simple pleasure of watching light filter in through the large window, which captures why light matters so much in an attic.

    A statement window also adds architectural character that attics often lack. A distinctive shape, like a large half-round or arched window, becomes a focal point that lends the whole room personality. So beyond the practical benefit of daylight, the right window elevates the entire space aesthetically, which is remarkable value from a single, affordable element.

    Finding an Affordable Statement Window

    The magic of the $200 window story is that the window was a bargain find, and you can hunt for similar deals. Beautiful, characterful windows turn up secondhand and surplus for a fraction of new custom prices if you know where to look.

    • Architectural salvage and reclaim yards, which specialize in secondhand building materials
    • Surplus and building-material outlet stores, where overstock is marked down
    • Online marketplaces and classifieds, where people sell leftover or removed windows
    • Habitat for Humanity ReStores and similar reuse centers
    • Contractor overstock and remodeling leftovers, sometimes sold cheaply

    When buying secondhand, check the window’s condition, glass integrity, and dimensions carefully, and remember that a non-standard size may need a custom opening. But with patience, a striking window for a couple of hundred dollars is genuinely achievable.

    More Budget Ways to Brighten an Attic

    A statement window is the star, but several other affordable moves amplify light and warmth in an attic. Combining them stretches a small budget into a big transformation.

    • Paint walls and sloped ceilings in light, soft colors to bounce light around
    • Use mirrors to reflect natural light deeper into the space
    • Add layered lighting, including fun fixtures and even color-changing bulbs, for the angled ceilings
    • Build a window bench that adds seating and storage while hiding ductwork
    • Choose light flooring and simple furnishings to keep the space feeling open

    The Clever Window Bench Trick

    One especially smart idea from the popular makeover is the window bench, which pulls multiple duties at once. Placed beneath the new window, a built-in bench can conceal unsightly ductwork or awkward structural elements, provide valuable storage inside, and serve as a display shelf or a cozy reading nook to enjoy the light. In an attic, where sloped ceilings and odd angles create tricky dead spaces, a bench like this turns a problem area into a functional, attractive feature. It is a great example of budget-savvy design solving several issues with one built-in.

    Safety, Egress, and Permits

    As inspiring as a budget window transformation is, it comes with serious practical cautions, especially if you are converting an attic into a bedroom. Many areas require an attic bedroom to have an egress window, one large enough and low enough to serve as an emergency exit, so a decorative window alone may not satisfy code for a sleeping room. Cutting a new opening into a wall or roof affects the structure and must be done correctly, and attic conversions often require permits and may involve structural, electrical, or insulation work.

    This is where the budget-DIY spirit meets reality: sourcing an affordable window is something a savvy homeowner can do, but installing it, particularly cutting openings, ensuring structural integrity, meeting egress rules, and handling electrical or roof work, is generally a job for licensed professionals. Check with your local building department before starting, and bring in qualified pros for the structural and code-sensitive parts.

    Frequently Asked Questions

    Can a single window really transform an attic?

    Yes. Because attics are typically dark and closed-in, adding a window floods the space with natural light, makes it feel larger and more inviting, and adds architectural character. A distinctive window becomes a focal point, delivering a big impact for relatively little cost.

    Where can I find a cheap statement window?

    Look at architectural salvage yards, surplus and building-material outlets, reuse centers like Habitat ReStores, and online marketplaces. People often sell characterful or leftover windows cheaply, so with patience you can find a striking window for a couple of hundred dollars.

    Do attic bedrooms need a special window?

    Often yes. Many codes require an attic bedroom to have an egress window large and low enough to serve as an emergency exit. A decorative window alone may not meet that requirement, so check local codes before converting an attic into a sleeping room.

    Is installing an attic window a DIY job?

    Sourcing the window can be DIY, but installation usually is not. Cutting openings, ensuring structural integrity, meeting egress rules, and any roof or electrical work should be handled by licensed professionals, and permits are often required, so check with your building department first.

    Styling the Space Around Your Window

    Once a beautiful, affordable window is bringing light into your attic, the rest of the design should work with it to maximize the effect. The window becomes the focal point, so arrange the room to draw attention to it and let its light reach as far as possible. Keeping the area around the window relatively open, rather than crowding it with tall furniture, preserves both the view and the flow of daylight.

    Color and reflective surfaces amplify the payoff. Soft, light wall and ceiling colors bounce the natural light around the sloped attic surfaces, making the whole space feel brighter and larger, while a well-placed mirror can throw light into darker corners. Simple, low-profile furnishings suit attic proportions and keep the room feeling airy rather than cramped under the angled ceilings.

    Finally, lean into the character an attic offers. Those quirky angles and the distinctive window are features, not flaws, so playful lighting choices, a cozy window seat, and personal touches like plants and framed art turn the space into a retreat. The goal is a room that feels intentional and inviting, built around the light and character your budget-friendly window provides.

    • Keep the window area open to preserve light and views
    • Use light wall and ceiling colors to bounce daylight
    • Add a mirror to reach darker corners
    • Choose low-profile furniture suited to attic angles
    • Embrace the quirky angles with cozy, personal touches

    Final Thoughts

    The $200 window attic renovation captures a genuinely useful truth: in a dark, awkward attic, one affordable statement window can do more than an expensive full remodel, flooding the space with light and giving it character. Hunt for a bargain window at salvage yards and surplus stores, pair it with light colors, mirrors, and a clever window bench, and you can transform an attic on a modest budget. Just respect the practical side, egress, structure, and permits, and bring in professionals for the code-sensitive work so your beautiful, bright attic is also safe and legal.

  • SimpliSafe Smart Alarm Wireless Indoor Security Camera: What to Know

    SimpliSafe Smart Alarm Wireless Indoor Security Camera: What to Know

    The SimpliSafe smart alarm wireless indoor security camera is designed to work as part of a broader home security system, combining live video monitoring with alarm sensors rather than functioning as a standalone gadget on its own. It connects wirelessly, so there’s no drilling into walls for wiring, and it ties directly into SimpliSafe’s alarm and professional monitoring ecosystem.

    For homeowners already using or considering a SimpliSafe base system, this camera adds visual verification to alerts, meaning you don’t just get notified that a door opened, you can actually see what triggered it in real time or shortly after. Below is a closer look at how it works, what to expect from setup to daily use, and how it stacks up against standalone smart cameras.

    It’s a good example of how home security has shifted over the past decade, from systems that simply made noise when something went wrong, to systems that let you actually see and respond to what’s happening from wherever you are.

    Quick Facts

    Camera Type Indoor, wireless
    Works Independently? Limited, best used with SimpliSafe base station
    Video Resolution 1080p HD (typical)
    Night Vision Yes
    Two-Way Audio Yes
    Storage Type Cloud storage (subscription-based)
    Power Source Plug-in (not battery-only)
    Setup Time 15 – 20 minutes via app

    How It Fits Into a SimpliSafe System

    Unlike some standalone smart cameras, this one is built to communicate directly with SimpliSafe’s base station and connected sensors. When a door or motion sensor triggers an alert, the camera can provide visual confirmation of what actually happened, rather than leaving you to guess.

    This integration reduces false alarms significantly, since either the monitoring center or the homeowner can review a live or recorded clip before deciding whether it’s a genuine concern or just the family cat knocking something off a shelf.

    The camera also becomes part of the system’s overall event timeline, so a triggered sensor and the corresponding video clip show up together in the app, making it much easier to piece together what happened while you were away.

    Key Features at a Glance

    The camera is built around a handful of core capabilities that matter most for everyday indoor monitoring rather than a long list of gimmicky extras.

    Feature Details
    Video Quality 1080p HD with clear daytime footage
    Night Vision Infrared, decent range in dark rooms
    Motion Detection Adjustable sensitivity zones
    Two-Way Talk Speak through the app in real time
    App Alerts Push notifications on motion or system trigger
    Privacy Shutter Physical or software cover option on most models

    Setup and Placement Tips

    Setup generally takes 15 to 20 minutes through the SimpliSafe app, which walks through Wi-Fi pairing and account linking step by step with fairly clear on-screen instructions.

    Placement matters more than most people expect. Corners near entry points, hallways, and living rooms tend to give the widest useful field of view, capturing the most relevant activity in a single frame.

    • Mount near entry points like the front door or main hallway for the widest coverage
    • Avoid pointing directly at windows during the day, since backlight can wash out footage
    • Keep the camera at least a few feet from air vents to avoid triggering motion from moving curtains
    • Position at a height of roughly 7-8 feet for the best angle on faces and activity

    Subscription and Storage Considerations

    Live viewing typically works without a subscription, but recorded video history and cloud storage usually require an active monitoring plan. It’s worth checking current plan tiers directly before assuming full functionality comes free with the hardware.

    Without an active plan, some features like recorded clip playback may be limited or unavailable entirely, so factor the ongoing monthly cost into your overall decision, not just the upfront price of the camera itself.

    How It Compares to Standalone Smart Cameras

    Standalone smart cameras from other brands often work independently of any alarm system, which can be simpler for people who just want basic monitoring without a broader security setup.

    The SimpliSafe camera’s real advantage is integration. If you already have, or plan to get, a full alarm system, the combined setup gives far more context per alert than a camera working in isolation ever could.

    Aspect SimpliSafe Camera Standalone Camera
    Alarm Integration Built-in Usually none
    Setup Complexity Simple if already using SimpliSafe Simple on its own
    Best For Existing SimpliSafe households Single-camera, no-alarm setups
    Monitoring Tie-In Professional monitoring available Self-monitoring only

    Common Questions About Privacy and Data

    Indoor cameras naturally raise privacy questions, especially in shared or family homes. Most models include a physical or software-based privacy shutter that can be activated when the camera shouldn’t be recording, such as during certain hours at home.

    It’s worth reviewing the specific data retention and cloud storage policy for your monitoring plan, since footage retention periods and data handling can vary between subscription tiers.

    Maintaining the Camera Over Time

    Once installed, an indoor camera needs relatively little ongoing attention, but a few habits keep it working reliably for years rather than becoming an ignored gadget gathering dust on a shelf.

    Treat it a bit like any other small electronic device in the house: a quick glance every so often to confirm it’s still online and recording as expected goes a long way toward catching problems before they become a gap in your coverage right when you need it most.

    • Wipe the lens gently every few weeks to remove dust that can blur footage
    • Check the app periodically for firmware updates, which often improve motion detection accuracy
    • Reposition the camera if furniture or decor changes block its field of view
    • Test two-way audio occasionally to confirm the microphone and speaker are both working

    Is It a Good Fit for Renters?

    Because the camera is wireless and doesn’t require permanent wiring, it’s a reasonably renter-friendly option compared to hardwired alarm systems that involve drilling and panel installation.

    Renters should still check their lease for any restrictions on security devices, and consider using adhesive mounts instead of screws where possible to avoid leaving marks on walls when it’s time to move out.

    Comparing Cost Over Time

    It helps to think of the camera’s true cost as more than just the upfront hardware price, since ongoing monitoring plans add up over a year or more of use.

    Cost Type Typical Range
    Camera hardware (one-time) $80 – $150
    Basic monitoring plan (monthly) $10 – $20
    Advanced plan with video history (monthly) $20 – $30
    Estimated first-year total cost $200 – $500

    Placement Ideas for Multi-Camera Households

    Households with more than one camera get the most value by covering distinct zones rather than clustering cameras in the same room. A common setup places one camera near the main entry, one in a central living space, and one covering a secondary entrance like a garage door or back hallway.

    This layout minimizes blind spots without requiring an excessive number of devices, keeping both the hardware cost and the number of notifications manageable.

    Getting the Most Value From Professional Monitoring

    One detail that sets this camera apart from many standalone options is the possibility of professional monitoring, where a live agent can review an alert and contact emergency services on your behalf if needed.

    This is particularly useful for households that travel often or include family members who may not check phone notifications right away, since it adds a layer of response that doesn’t depend entirely on someone being available to look at the app in the moment.

    Frequently Asked Questions

    Does the SimpliSafe camera work without a subscription?

    Live viewing generally works without one, but recorded footage history and cloud storage typically require an active monitoring plan.

    Can I use this camera without the rest of the SimpliSafe system?

    It can function on its own to a degree, but its main advantage, tying video to alarm triggers, only works when paired with a SimpliSafe base station and sensors.

    Is the camera battery-powered or does it need to be plugged in?

    It’s designed as a plug-in device rather than battery-only, which avoids the hassle of recharging but means it needs to stay near an outlet.

    How many cameras can I add to one system?

    Most SimpliSafe systems support multiple indoor and outdoor cameras, though exact limits depend on your specific base station and plan.

    Is this camera a good option for renters?

    Generally yes, since it’s wireless and can often be mounted without permanent drilling, though it’s worth checking your lease terms first.

    Does it work if my internet goes down?

    Local alarm functions may still work, but live viewing, alerts, and cloud recording all depend on an active internet connection to function properly.

    Can multiple family members access the camera app at once?

    Yes, most plans support multiple user logins so different household members can view live feeds and receive alerts on their own devices.

    Final Thoughts

    The SimpliSafe smart alarm wireless indoor security camera makes the most sense as part of a connected home security setup rather than a one-off purchase. If you already trust the SimpliSafe ecosystem, adding this camera brings valuable visual context to every alert, which is often the missing piece in basic alarm-only systems. Weigh the ongoing subscription cost against the convenience it adds, and place it thoughtfully, and it becomes one of the more genuinely useful smart home additions rather than a gadget that gets ignored after the first week.

  • How Long Do Refrigerators Last? A Realistic Lifespan Guide

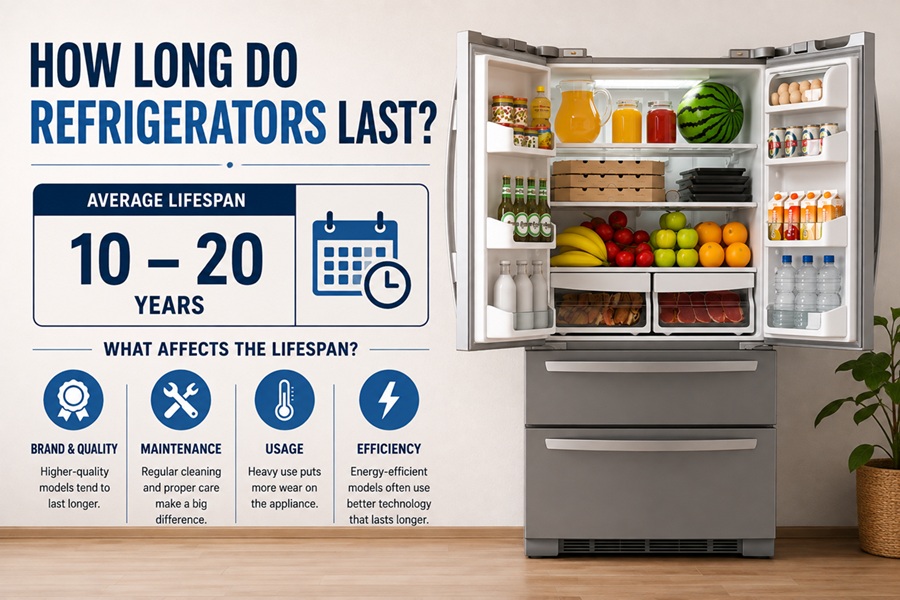
    How Long Do Refrigerators Last? A Realistic Lifespan Guide

    On average, a refrigerator lasts between 10 and 20 years, with most units giving reliable service for about 13 to 15 years before repairs start costing more than a replacement would. The exact number depends heavily on the type of fridge, how often it runs, the climate it sits in, and whether it gets even basic maintenance along the way.

    That said, a refrigerator’s lifespan isn’t just a number printed on a warranty card. A poorly maintained top-freezer model can quit at year eight, while a well-cared-for French door fridge can push past 17 years without a single major repair. Below, we’ll walk through what actually drives that number, how different types compare, what shortens a fridge’s working life, and how to tell when yours is genuinely on its way out rather than just having an off week.

    Quick Facts

    Average Lifespan 10 – 20 years
    Best Performing Type Top-freezer models
    Shortest Lifespan Type Built-in / side-by-side with icemakers
    Typical Compressor Life 15+ years if well maintained
    Common Failure Point Compressor, door seals, evaporator fan
    Recommended Coil Cleaning Every 6 months
    Average Repair Cost $200 – $400
    Signs of Replacement Need Frequent repairs, warm spots, rising energy bills

    Why Refrigerator Lifespan Varies So Much

    It helps to understand that a refrigerator isn’t one appliance, it’s several systems working together nonstop: a compressor that pumps refrigerant, a set of coils that release heat, a fan that circulates cold air, and door seals that keep that cold air locked inside. Every one of those parts wears down at its own pace, and the fridge’s overall lifespan is really just a reflection of whichever part fails first.

    That’s why two identical fridges, bought the same week from the same store, can age completely differently depending on their households. A fridge in a hot garage running nonstop through summer will age faster than the same model in a climate-controlled kitchen. A household that opens the door forty times a day puts more strain on the compressor than one that opens it a dozen times.

    Manufacturers design most modern refrigerators with an expected service life somewhere in the 10 to 15 year range, but that number assumes average conditions and at least minimal upkeep. Skip the upkeep entirely, and you can knock several years off that estimate without realizing it.

    Lifespan by Refrigerator Type

    Not every refrigerator wears out at the same rate. Simpler designs with fewer moving parts and fewer built-in features tend to outlast the feature-heavy models that pack in ice makers, water dispensers, and dual compressors.

    Here’s a general comparison based on typical usage patterns and the repair histories most appliance technicians report seeing in the field.

    Refrigerator Type Average Lifespan Notes
    Top-Freezer 15 – 20 years Fewest moving parts, most reliable overall
    Bottom-Freezer 13 – 17 years Slightly more complex mechanics than top-freezer
    Side-by-Side 12 – 15 years More components, higher failure rate
    French Door 12 – 17 years Varies heavily by brand and build quality
    Built-In / Panel-Ready 18 – 20 years Expensive but engineered for longevity
    Mini Fridge / Compact 6 – 10 years Cheaper components, shorter working life

    Why Simpler Models Often Outlast Feature-Rich Ones

    An ice maker sounds like a small convenience, but it adds a water line, a solenoid valve, and a small motor, each of which is one more thing that can eventually fail or leak. The same goes for through-door water dispensers and dual-zone cooling systems.

    None of this means feature-rich fridges are a bad choice. It simply means the more complex the machine, the more individual points of failure it has, and the more likely something small breaks before the compressor itself ever does.

    What Shortens a Refrigerator’s Life

    A refrigerator runs nonstop, every single day of the year, which means small issues compound quickly instead of staying minor. A handful of everyday habits and conditions are responsible for most premature failures.

    • Dust-clogged condenser coils, forcing the compressor to run longer and hotter than it should
    • Frequent door opening or leaving the door ajar, which lets warm air in constantly
    • Overpacking shelves, which blocks internal airflow and forces the compressor to compensate
    • Setting the temperature colder than necessary, adding unnecessary strain for no real benefit
    • Placing the fridge next to a stove, dishwasher, or in direct sunlight, all of which add ambient heat
    • Ignoring a failing door seal, which lets cold air leak out around the clock

    Signs Your Refrigerator Is on Its Way Out

    Refrigerators rarely die without warning. Most give a few clear signals in the weeks or months leading up to a full breakdown, and catching them early can mean the difference between a simple repair and an emergency replacement.

    Watch for these patterns rather than waiting for the compressor to stop entirely.

    Warning Sign What It Usually Means
    Motor running constantly Compressor struggling, or seals may be worn
    Food spoiling faster than usual Inconsistent internal temperature
    Excess condensation or frost buildup Door seal failure or blocked airflow
    Loud buzzing, rattling, or clicking Compressor or fan motor wearing out
    Rising electricity bill with no other changes Unit working harder to hold temperature
    Cracks, rust, or pooling water near the base Structural wear, often paired with a slow leak

    Repair or Replace? A Simple Way to Decide

    A common rule of thumb in the appliance repair world is the 50 percent rule. If a repair quote comes in at more than half the price of a comparable new unit, replacement usually makes more financial sense than fixing it.

    Age matters just as much as the repair cost itself. A pricey repair on a 4-year-old fridge is often worth doing, since most of the machine still has plenty of life left. That same repair on a 14-year-old unit rarely pays off, because other parts are likely close to failing too, and you could be back to square one within a year.

    Fridge Age Repair Cost vs New Price General Recommendation
    0 – 5 years Any reasonable cost Repair
    6 – 9 years Under 40% of new price Repair
    10 – 13 years Under 25% of new price Repair with caution
    14+ years Any cost Replace

    How to Help Your Refrigerator Last Longer

    A few simple habits can add real years to your refrigerator’s working life, and none of them require any technical skill.

    • Clean the condenser coils twice a year using a vacuum or coil brush
    • Leave at least two inches of clearance around the back and sides for airflow
    • Test door seals periodically by closing the door on a piece of paper and pulling it out
    • Keep the fridge set to 37°F and the freezer to 0°F, no colder
    • Avoid overpacking shelves so cold air can circulate freely
    • Vacuum dust from underneath and behind the unit, not just the visible coils

    The Hidden Cost of Keeping an Aging Fridge Too Long

    It’s tempting to keep squeezing life out of an old refrigerator, especially if it’s still technically running. But an aging compressor working overtime doesn’t just risk sudden failure, it quietly drives up your electricity bill month after month, often by 20 to 30 percent compared to a newer, more efficient model.

    There’s also a real risk with food safety. A fridge that’s struggling to hold temperature consistently can leave perishables in the danger zone without any obvious sign, which is a bigger downside than most people factor into the repair-or-replace decision.

    It’s worth running the numbers honestly. An old fridge quietly costing an extra $8 to $15 a month in electricity adds up to $100 to $180 a year, money that could instead go toward a newer, more efficient replacement that also comes with a fresh warranty.

    How Placement and Installation Affect Longevity

    Where a refrigerator sits in your home has more impact on its lifespan than most people expect. Compressors are designed to release heat efficiently, and anything that traps that heat around the unit forces it to work harder around the clock.

    Garages and unfinished basements are common problem spots, especially in climates with hot summers or freezing winters, since most standard refrigerators aren’t designed to operate reliably outside a fairly narrow ambient temperature range.

    Installation Factor Impact on Lifespan
    Less than 1 inch clearance around unit Restricts airflow, shortens compressor life
    Placed next to oven or dishwasher Added ambient heat increases strain
    Installed in unconditioned garage Extreme temperatures can damage components
    Uneven flooring Door seal misalignment, cooling leaks
    Proper clearance and level installation Supports full expected lifespan

    Is an Extended Warranty Worth It?

    Most refrigerators come with a standard manufacturer warranty covering one year on parts and labor, sometimes extending five to ten years on the compressor specifically, since that’s historically the most expensive part to replace.

    An extended warranty can make sense for higher-end built-in models where a single repair visit might otherwise cost several hundred dollars, but for basic top-freezer models, the math often doesn’t favor the extra cost, since the appliance itself is relatively inexpensive to replace outright.

    What to Do With Your Old Refrigerator

    Once a fridge is genuinely at the end of its life, don’t just leave it curbside. Refrigerators contain refrigerant and insulating foam that require proper handling, and many local utility companies or municipalities offer free pickup and recycling programs, sometimes with a small rebate attached.

    If the unit still runs but you’re upgrading for other reasons, donating it or selling it secondhand is often a better option than recycling, giving it a second life in another household before it eventually reaches the end of its usable years.

    Frequently Asked Questions

    Do refrigerators really last 20 years?

    Some do, particularly simple top-freezer models and high-end built-in units that get regular coil cleaning and aren’t overworked. It’s the upper end of the range rather than the average, though.

    Does brand matter more than type?

    Type and build quality both matter, but consistent maintenance tends to make a bigger difference than brand alone. A mid-range fridge that’s cleaned and cared for regularly can easily outlast a premium model that’s neglected.

    Is it normal for a refrigerator to run all the time?

    A refrigerator cycles on and off throughout the day, but constant, nonstop running usually signals dirty coils, a failing seal, or a compressor under strain, not normal operation.

    Should I replace a refrigerator before it fully breaks?

    If it’s over 13-15 years old and needs a repair costing more than a third of a new unit’s price, replacing it proactively usually saves money and hassle in the long run.

    Can a refrigerator’s location really shorten its life?

    Yes. Garages, uninsulated basements, and spots near ovens or heat sources all force the compressor to work harder than it would in a standard kitchen setting, which adds up over the years.

    Is it better to repair the compressor or replace the whole fridge?

    It depends on age. A compressor replacement on a unit under 7 years old is usually worthwhile, but on anything past 10 to 12 years, replacing the whole fridge is typically the more practical choice.

    Final Thoughts

    Most refrigerators will comfortably serve a household for well over a decade, and many stretch past 15 or even 20 years with basic care. Pay attention to the early warning signs, keep the coils clean twice a year, and don’t ignore a rising energy bill — it’s often the first quiet clue that your fridge is asking for help before it eventually asks for retirement.