Category: Garden & Outdoors

Gardening, landscaping, lawn care, and patios

  • Edging for Landscaping: Types, Materials, and How to Choose the Right One

    Edging for Landscaping: Types, Materials, and How to Choose the Right One

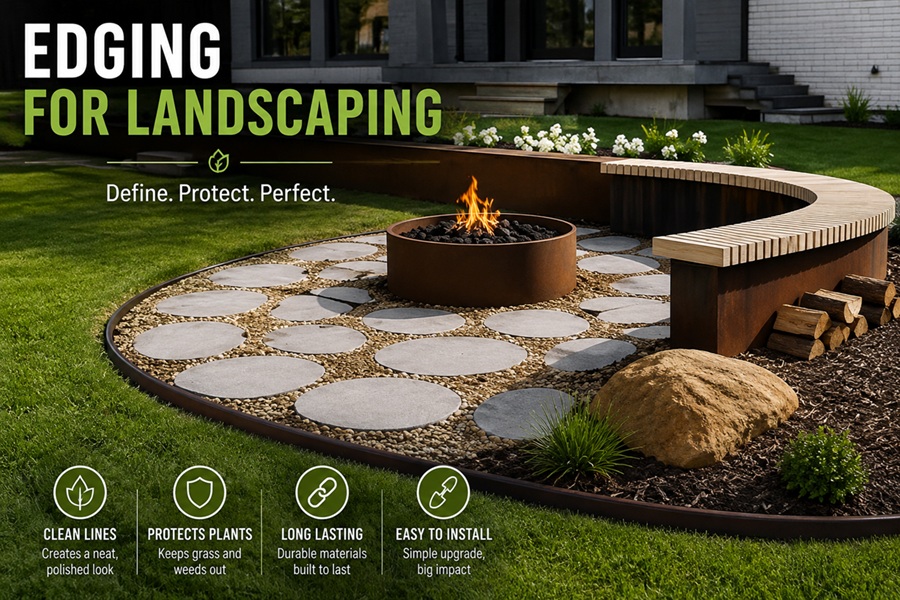
    Landscape edging is the border material — metal, plastic, stone, brick, or wood — installed between two different surfaces, like a lawn and a flower bed, to keep them from blending into each other. It stops grass from creeping into mulch, keeps gravel paths from spreading, and gives beds a clean, defined line without constant re-trimming.

    The right edging choice depends less on looks alone and more on what it needs to hold back, how much upkeep is acceptable, and what the budget allows. The sections below cover the main edging types, where each works best, and how to install and maintain them.

    Landscape Edging Quick Facts

    Detail General Guideline
    Typical installation depth 2–5 inches into the ground
    Most common materials Metal, plastic, stone, brick, concrete, wood
    Average DIY cost per linear foot $1–$8
    Average professionally installed cost $5–$25 per linear foot
    Lifespan (metal or stone) 15–30+ years
    Lifespan (plastic) 5–10 years
    Best time to install Spring or fall, in workable soil

    What Landscape Edging Actually Does

    Beyond looking tidy, edging solves a few practical problems at once. It keeps grass roots from spreading into garden beds, holds mulch or gravel in place during heavy rain, and creates a clean mowing line so string-trimming along every bed isn’t necessary.

    It also helps separate materials that don’t mix well, such as keeping decorative rock from migrating into soil, or preventing a gravel path from washing into the lawn after a storm.

    Main Types of Landscape Edging

    Metal Edging (Steel or Aluminum)

    Thin strips of steel or aluminum bend easily into curves, making them a favorite for flowing bed lines. Steel edging is more rigid and long-lasting; aluminum resists rust and is lighter to install. Both sit mostly hidden below the soil line, showing only a slim, clean edge.

    Plastic or Vinyl Edging

    The most budget-friendly option, plastic edging comes in rolls or rigid sections and is easy for a beginner to install in an afternoon. It holds up fine for a few years but can crack in freezing climates and tends to look less polished over time than metal or stone.

    Natural Stone Edging

    Fieldstone, flagstone, or river rock set along a bed edge gives a natural, informal look. It’s heavier to install and less precise for tight curves, but it doesn’t rust, crack, or fade, and it blends well with cottage or woodland-style landscaping.

    Brick Edging

    Bricks set on edge or at an angle (soldier or sailor style) create a classic, structured border. They pair especially well with traditional home exteriors and can be laid without mortar for an easy weekend project.

    Poured Concrete Edging

    A continuous concrete border, either poured on-site or precast in sections, offers a permanent, low-maintenance edge. It costs more upfront and is harder to modify later, but it won’t shift, heave, or need replacing for decades.

    Wood Edging

    Landscape timbers or cedar boards give a warm, natural look that suits rustic or vegetable garden settings. Untreated wood typically lasts 5–10 years before it needs replacing, while rot-resistant species like cedar or redwood last longer.

    Comparing Edging Materials Side by Side

    Material Best For Approx. Lifespan
    Metal Curved beds, clean modern lines 15–30 years
    Plastic Budget projects, straight or gentle curves 5–10 years
    Natural stone Informal, cottage, or woodland gardens 20+ years
    Brick Traditional homes, formal beds 20+ years
    Concrete Permanent borders, driveways, paths 25–30+ years
    Wood Rustic beds, vegetable gardens 5–15 years

    Choosing Edging Based on What It’s Holding Back

    Not every edging type is suited to every job. A material that works well for separating lawn from mulch may not be sturdy enough to contain loose gravel.

    What You’re Containing Recommended Edging
    Grass from garden beds Metal or plastic, buried 3–4 inches deep
    Mulch from spreading onto paths Brick, stone, or metal border
    Loose gravel or rock Rigid metal or concrete edging, taller profile
    Raised vegetable beds Wood timbers or cedar boards
    Driveway or walkway borders Brick, concrete, or paver edging

    How to Install Basic Landscape Edging

    Most edging types follow a similar general process, even though materials differ in the details. Marking the line first, digging a clean trench, and setting the material at a consistent depth make the biggest difference in how professional the final result looks.

    Step What to Do
    1. Mark the line Use a hose or spray paint to outline the shape before digging
    2. Dig the trench Cut a clean edge 2–5 inches deep, depending on material
    3. Set the edging Press or stake material firmly along the trench line
    4. Backfill Pack soil on both sides to hold the edging in place
    5. Finish the bed side Add mulch, gravel, or plants up to the new edge

    Maintenance by Material Type

    Edging maintenance needs vary quite a bit by material. Metal and concrete need almost no attention once installed, while wood and plastic benefit from a periodic check for damage or shifting.

    Wood edging should be inspected each spring for rot or insect damage, especially where it touches damp soil. Plastic edging can heave out of the ground after a hard freeze-thaw cycle and may need to be reset. Stone and brick occasionally need re-leveling if they settle unevenly, but otherwise hold their position for years.

    Budget Planning for an Edging Project

    Cost depends heavily on material choice and whether the project is DIY or professionally installed. A small flower bed border costs far less than edging an entire property line.

    Material DIY Cost per Linear Foot Professional Cost per Linear Foot
    Plastic $1–$3 $4–$7
    Metal $3–$6 $8–$14
    Wood $2–$5 $6–$12
    Brick $4–$8 $10–$18
    Natural stone $5–$10 $12–$25
    Concrete $6–$12 $15–$25

    Common Mistakes to Avoid

    A few recurring mistakes account for most edging projects that don’t hold up. Setting the edging too shallow lets grass roots creep underneath within a season. Skipping a level check leads to a wavy line that’s obvious from a distance.

    Choosing plastic edging in a climate with hard freezes is another common regret, since repeated frost heave can pop it out of the ground within a couple of years. Matching the material to the climate and the job it needs to do avoids most of these issues.

    Final Thoughts

    Landscape edging is a small detail that has an outsized effect on how finished a yard looks. Matching the material to the job — metal for flowing curves, brick for formal lines, stone for a natural look, wood for garden beds — keeps the border doing its job for years instead of needing to be redone every season.
  • The Complete Guide to Backyard Fire Pit Landscaping Ideas

    The Complete Guide to Backyard Fire Pit Landscaping Ideas

    A fire pit earns its place in a backyard when the ground around it is designed with the same care as the pit itself. That means a stable, fire-safe surface, seating that actually fits the space, and plant choices that won’t need to be ripped out the first time embers drift. Skip that planning and even a beautiful fire pit ends up looking like it was set down in the wrong spot.

    This guide walks through the layout decisions, style directions, plant pairings, seating layouts, and material choices that turn a fire pit from a lone feature into a full outdoor room — plus answers to the questions homeowners ask most often before starting the project.

    Fast Facts Table

    Detail General Guideline
    Clearance from house or fence 10–15 feet minimum
    Clearance from tree canopies 15–20 feet minimum
    Base surface options Gravel, pavers, poured concrete, flagstone
    Comfortable seating radius 12–16 feet across
    DIY project cost range $300–$900
    Professionally installed cost range $1,500–$6,000
    Fuel choices Wood-burning, natural gas, propane
    Best season to build Spring or early fall, before ground freezes

    Step One: Reading Your Yard Before You Design Anything

    Every good fire pit layout starts with a walk around the yard, not a shopping trip. Note where the sun sits in the evening, which direction prevailing wind tends to blow, and how the ground slopes after rain.

    A pit set at the low point of the yard will collect water and mud. One placed too close to a fence line may violate local fire codes before construction even begins. Twenty minutes of observation upfront saves a lot of rework later.

    Checking Local Codes First

    Many municipalities set minimum distances for open flame features from structures, property lines, and overhead branches. Some require a permit for permanent gas lines. A quick call to the local building department avoids a costly redo.

    Why Landscaping Changes How a Fire Pit Feels

    Two homeowners can install the exact same steel fire bowl and end up with completely different results. One drops it on bare lawn; the other builds a gravel pad, adds a low stone border, and plants a few ornamental grasses nearby. The second version reads as a finished feature rather than a temporary setup.

    Factor No Landscaping Thoughtful Landscaping
    First impression Looks temporary, incomplete Reads as a planned outdoor room
    Ground condition Grass dies, mud forms nearby Durable, walkable surface
    Fire safety Higher risk from nearby grass/mulch Fire-safe buffer zone built in
    Home value impact Negligible Recognized as a livable outdoor upgrade

    Fire Pit Style Ideas That Work With Your Existing Landscape

    Rather than picking a fire pit style first, it usually works better to look at what’s already growing and built in the yard, then choose a direction that complements it.

    Rustic Stone Fire Pit With a Gravel Apron

    Fieldstone or dry-stacked stone paired with pea gravel gives a cabin, lake-house feel. It suits yards with mature trees, wood fencing, or an already-informal layout, and it tolerates an imperfectly level yard better than most other styles.

    Modern Sunken Fire Pit With Large-Format Pavers

    Set slightly below grade and ringed with oversized concrete or porcelain pavers, this style suits contemporary homes with clean architectural lines. Built-in bench seating and structured plantings — think boxwood or ornamental grass in straight rows — complete the look.

    Desert and Xeriscape Fire Pit

    A steel or concrete fire bowl set in decomposed granite, surrounded by boulders and drought-tolerant succulents, suits dry climates and low-water landscaping goals. It’s also one of the lowest-upkeep styles on this list.

    Cottage Garden Fire Pit

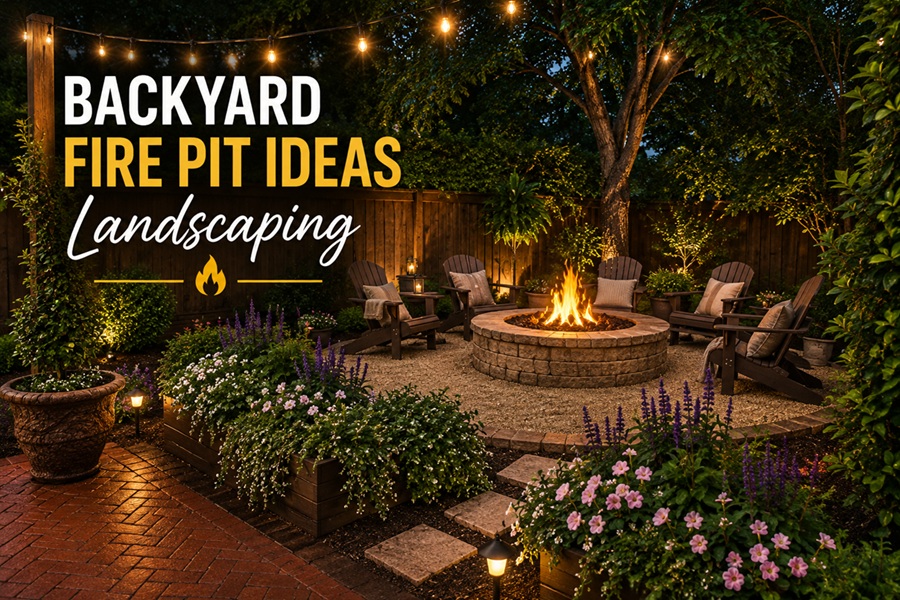
    A brick or stacked-stone pit surrounded by layered perennial beds — lavender, coneflower, salvia — turns the area into more of a garden nook than a patio feature. Flowering plants should sit a few feet back from the flame to stay safe and healthy.

    Coastal-Inspired Fire Pit

    Pale pavers, beach stone, and weathered wood furniture create a relaxed, breezy feel. This style leans on texture and neutral color rather than heavy planting, keeping maintenance minimal.

    Woodland Fire Pit Nook

    Tucked at a safe distance into an existing tree line, with a simple stone or metal pit set on mulch or gravel, this style creates a quiet retreat separate from the main lawn. Low uplighting on nearby trunks adds atmosphere without overpowering the setting.

    Plant Choices That Pair Safely With a Fire Pit

    Not every plant belongs near an open flame. The best choices are slow-growing, low-flammability, and don’t drop a lot of dry debris.

    Plant/Element Distance From Flame Reason It Works
    Ornamental grasses 4+ feet Movement and texture, easy to trim back
    Sedum and succulents 2–3 feet Naturally fire-resistant, low water needs
    Lavender 3+ feet Fragrant, drought-tolerant, tidy growth habit
    Low stone or brick edging Edge of seating zone Keeps grass and mulch from creeping in
    Gravel or decomposed granite base Entire pit footprint Fire-safe, drains well
    Raised planting bed Perimeter of the seating zone Adds height, separates pit from open lawn

    Avoid resinous shrubs like juniper close to the flame — they ignite easily and burn fast. Mulch beds should be pulled back at least a few feet from any fire feature.

    Matching Seating to Yard Size

    A layout that works in a small courtyard will feel cramped in a large backyard, and vice versa. Sizing the seating to the space keeps the area comfortable rather than either crowded or awkwardly empty.

    Yard Size Seating Approach Approximate Capacity
    Small (under 15×15 ft) Movable chairs, no permanent structures 4 people
    Medium (15×20 ft) One built-in bench plus a few chairs 6–8 people
    Large (20×25 ft or more) Full bench ring plus a separate lounge area 10 or more people

    Materials and Cost Planning

    Material choice affects both the upfront cost and how much upkeep the space needs going forward. Gravel is the cheapest and fastest option; poured concrete or natural stone cost more but need far less attention over time.

    Material Cost Tier Long-Term Maintenance
    Gravel base $ Occasional raking and topping up
    Paver patio $$ Light weeding between joints
    Poured concrete $$ Minimal, occasional resealing
    Natural stone $$$ Low upkeep, higher labor cost upfront

    A prefab steel fire bowl on a gravel pad is usually the fastest, most budget-friendly route to a finished-looking setup. A sunken pit, gas line, or built-in seating is generally worth hiring a landscaper for.

    Lighting and Pathway Details

    A fire pit rarely stands alone after dark. Low path lighting leading from the house, plus subtle uplighting on nearby trees or shrubs, extends the usable hours of the space and makes the walk out to the pit safer underfoot.

    String lights overhead are a popular, budget-friendly finishing touch, especially over a seating area used for more than just fire-pit nights.

    Maintaining the Space Season to Season

    A little upkeep keeps a fire pit landscape looking sharp for years. Clear leaves and debris from the base regularly, especially in fall, and keep a fitted cover on the pit itself between uses to protect it from rain and snow.

    Check local burn restrictions each season — some regions limit or ban wood-burning fires during dry spells. Gravel or decomposed granite bases benefit from a fresh top-up roughly once a year to stay level and full.

    Frequently Asked Questions

    How far should a fire pit be from the house?

    Most local codes call for at least 10 to 15 feet of clearance from the house, fence lines, and any structure. Always confirm the exact distance with local regulations before building, since requirements vary by area.

    What is the cheapest base material for a fire pit?

    Gravel is generally the most budget-friendly base. It’s fire-safe, drains well, and can be installed in a weekend without special equipment, though it needs occasional raking and topping up.

    Can I put a fire pit on grass?

    It’s not recommended long-term. Direct heat kills grass and creates a fire hazard from dry blades near the flame. A gravel, paver, or stone pad underneath is a safer and longer-lasting choice.

    What plants should I avoid near a fire pit?

    Skip resinous, oily shrubs like juniper and cedar, along with anything that drops a lot of dry leaves or needles. These ignite quickly and can carry a stray ember further than expected.

    Do I need a permit to build a fire pit?

    It depends on the type and location. A portable fire bowl usually doesn’t require one, but a permanent, in-ground pit — especially one connected to a gas line — often does. Checking with the local building department is the safest first step.

    How big should the seating area around a fire pit be?

    A comfortable seating zone typically spans 12 to 16 feet across, giving enough room for chairs or benches to sit a safe distance from the flame while still feeling like one connected space.

    Final Thoughts

    The fire pits that get used the most tend to be the ones built to fit the yard around them, not dropped in as an afterthought. Starting with a safe, level base, sizing the seating to the space, and choosing plants that can handle the heat sets the whole project up to last for years rather than one summer.